Monday, April 30, 2012

OPPPSSSS Belated Uploading of Homework 


I was just going through my blog and realised I hadn't uploaded the repeats that we had done in class, i swear i had already done it but looks like it didnt get posted so here it is... 


half drop

Created this one by following the tutorial thats available on uts online.... basically you create your image extend the canvas size then duplicate it and move the second one up so it sits in the middle of the previous one on the side, and do the same for the one below.

blended half drop

Blended half drop follows the same principles however to eliminate seams and track marks using the blur, clone and other tools. 
Toss repeat. 
Completed this using the tutorial... in simple terms set up the page using guides to cross the page so that there is 4 sections. Place the image into the middle page of each section then use other images to cover one of the corners along the guide lines... then move the horizontal half above the guide line down to the bottom horizontal line... and do the same along the vertical guide line.... so you should now have a filled in square! thats just simple terms but the tutorial on uts online in which we used has it in more technical terms. 

Here is some examples of other types of repeats. 

stripe


brick 

spot 


Diamond

Tossed
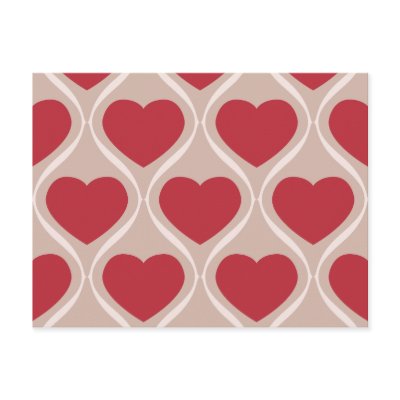
Ogee


Mirror
CHANGE OF COLOUR 

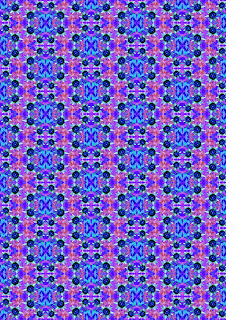
After starring at  the same colours I grew a strong hatred for them so I decided a change was needed. I adjusted the hue of the working pattern I had produced of my half drop repeat and fixed up some of the seams using the clone and blur tools, so I now have a seamless trackless perfect design ready to submit tomorrow! 


so here it is my mirrored repeat that turned into a block repeat that turned into a half drop, thats staying as a half drop.... I was going to attempt a toss but after thinking about it I think it would be too busy, I quite enjoy this one!

Thursday, April 26, 2012

HALF DROP TAKE 2

Didn't really think that the design was getting the full impact so i decided to enlarge the pattern using the free transform tool... heres the result... 
HALF DROP REPEAT


Manage to complete a half drop repeat using a bit of blending, cloning and brushes to eliminate seams.... I am pleased with the end product... rather like it. It has a bit of symmetry and what not. 
Might be the one!

Wednesday, April 18, 2012


PATTERN TRY NUMBER 2

This is one I decided to have a go at as a stripe mirror... However there is a small track mark.

I tried it again and was able to remove the track mark!


I also did one without the faded stripe.. just a normal mirror block repeat...


Still not sure whether or not I like the stripe or the normal one... It is a bit of an easy repeat... Might try some more later.


PATTERN TRY NUMBER 1

So I have been busy all day, and have put together this pattern... This is the factory pattern- The one used to "define pattern" on photoshop.

This is it on an A4 piece of paper.... The pattern works perfectly no track or seam marks, however the proportions dont work as well its a little big the pattern. Might try figuring it out a tad smaller because I really like it!
.

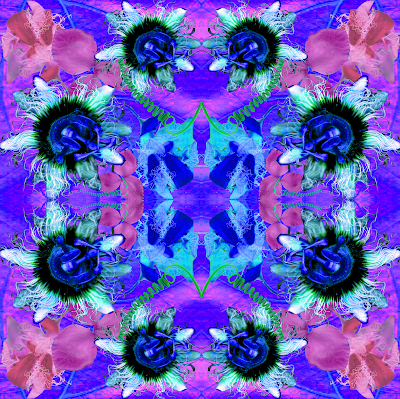
This was created by getting my saved scans that i had changed the hue and Saturation of, and arranging them in a square. I then followed a tutorial on a website, you can click HERE to view the tutorial.

P.s This is a mirror repeat!


A FEW EXPERIMENTS..

So during this rainy day I decided while some of the flowers were out in bloom in my backyard ( they are temperamental and only come out when they feel like it) to pick them and take a few scans of some of the aspects of the vine.

The scans above are obviously scanned at 300 DPI for the best quality resolution, And of course they have been saved for web and devices so i could upload them onto the blog!
This scan I have also used various tools such as the polygon lasso tool, magic wand, and quick selection to cut around the flower.... A bit of a challenge and I don't like the look of it all that much... at all actually. I would have loved the twirly things to have been clear and precise but I would have had to spend the next 300 years going around it very carefully.

I also did a bit of research for some cool colour schemes I could use, so that I could still incorporate the flower without it looking so crappy. I came across Peter Pilotto's Fall 2012 collection on The FASHION PACK WEBSITE. The neon blue and green colour scheme is really striking and fell semi in love.
Peter Pilotto Fall 2012


So I then began to experiment with my scans, changing the hue and saturation till a liked the colours, Put them all on the one page ( With layers and all) and just messed around with possible pattern combinations ... heres the result!


More Research...

I am currently doing an internship with Bec & Bridge at the moment and a few days ago I saw these amazing patterned jeans of theres that I wanted to try and test out in design pattern. There a new design of theres and I didn't think I could find them on the internet... and after a few hours trying to find an image in of these jeans i came to the conclusion they are nowhere to be found on the internet...But I will explain what they are, Basically they are a toss repeat that is then striped, however the second stripe is faded. It looked amazing so I might experiment with that idea as inspiration later.


I FOUND SOME THAT LOOK SIMILAR!! close enough at least. Taking my daily dose of The man repeller blog I stumbled across this post of hers... The jeans have a similar pattern to those Bec&Bridge ones. They look like a challenge but thats my goal to use my passionfruit vine and create a pattern like this. You can see more of the blog post by clicking here.. She didn't mention the designer so I couldn't reference it.


THE RESEARCH BEGINS

I decided what part of nature around my neighbourhood I was going to be looking at for this pattern... it wasn't very hard as i settled with the passion fruit vine in my back garden. I took a few photographs of them yesterday... so here are the raw images that have not been manipulated via photoshop yet... I intend to do this if I end up using these images in my pattern


Macro image: Of the vines that drop over the shed which is seen in the background. Also in the foreground is the vines that wrap around my balcony.


I decided to play around with the fish eye application on my phone, so the quality isn't as great as the other photos, but still here is the passionfruit itself. I actually cut the passion fruit in half because the colours within the passion fruit are quite bright so possibly might incorporate them into the design.


The image of the "cut- in- half" passionfruit


Micro image: This flower was the underlying reason I choose this vine, its so unusual and the wiggly lines from it almost look like fireworks or those sticks that you set alight and you twirl them around and they make great patterns.


Micro Image: Although this is meant to be a micro image i just could not get the camera to focus on the twirlly vine parts because they kept moving in the wind. But bare with the blurriness.

Micro image of the passionfruit flower


Monday, April 2, 2012

Tutorial


The hardest thing to achieve during this tutorial was deciding what brushes to use to create the look in which i wanted. Also deciding how to manipulate these brushes to make it appear to be hair was also challenging but apart from that, it was relatively straight forward.